菜单
语言


Beginner to Intermediate: A 3-Month Training Plan

Hitting the three-year mark in tennis is a common inflection point. You have built a solid foundation, you understand the mechanics, and you are comfortable at the 2.5 to 3.0 level. But breaking through that plateau to become a solid 3.5 intermediate player requires shifting from just “hitting balls” to structured, intentional repetition.

That is exactly where your ball machine becomes your secret weapon. Instead of relying on a hitting partner’s inconsistent feeds, you can drill specific weaknesses until they become strengths.

Here is a structured, 3-month roadmap designed to elevate your game using your ball machine.

 
The Training Roadmap

This plan focuses on three distinct phases: building unbreakable consistency, developing directional control, and finally, mastering aggressive transition play.


Month 1: The Foundation of Consistency
Weeks 1-4

The biggest difference between a 3.0 and a 3.5 player is unforced errors. This month is about eliminating them by building a reliable rally ball.

  • Focus: Depth and net clearance.

  • Machine Setup: Medium speed, moderate topspin, feeding deep down the center.

  • The Drill: The “10-Ball Challenge.” Your goal is to hit 10 consecutive balls past the service line without missing. If you miss in the net or hit it short, start the count over. Do not move on to a new drill until you complete the challenge for both forehands and backhands.


Month 2: Directional Control & Movement
Weeks 5-8

Now that you can keep the ball deep, you need to be able to move your opponent around the court.

  • Focus: Hitting crosscourt and down the line while moving.

  • Machine Setup: Turn on horizontal oscillation (sweep) to feed balls randomly to your forehand and backhand sides.

  • The Drill: Place a target in the deep ad-court corner and the deep deuce-court corner. As the machine feeds randomly, practice hitting exclusively crosscourt for 50 balls, then exclusively down the line for 50 balls. Focus on your recovery steps back to the center mark after every shot.

 
Month 3: The Transition Game & Finishing
Weeks 9-12

Intermediate players win points by attacking short balls and finishing at the net. This month, we build your transition game.

  • Focus: Approach shots and volleys.

  • Machine Setup: Program a two-line feed: one short ball, followed immediately by a deep ball (or a passing shot).

  • The Drill: As soon as you recognize the short feed, move in aggressively, hit your approach shot deep, and follow it to the net. Split-step, and volley the second feed away. This builds the crucial habit of continuous forward momentum.

To help visualize how to distribute your weekly sessions and track your machine settings across this 12-week progression, here is an interactive scheduler:


Pro Tip: Do not just swing away. Film yourself from behind the baseline at least once a week. Watching the footage will reveal if you are truly getting low and stepping into the ball, or if you are getting lazy with your footwork as the hopper empties.


How to Stay Mentally Focused During Long Drills

The beauty of solo training is that you have complete control over your practice. With your ADIBO ball machine, you can hit more balls in an hour than you would in a week of regular match play. However, having a relentless feeding partner comes with a hidden challenge: “zombie mode.”

When you are staring down a hopper of 100+ balls, it is incredibly easy to check out mentally, drop your intensity, and just mindlessly swing at the ball. To get the most out of your machine and truly level up your game, you need to train your mind alongside your strokes.

Here are the best strategies for maintaining razor-sharp mental focus and intensity during long solo training sessions.

1. Break the Hopper Down into “Micro-Sets”

Staring at 150 balls and thinking, “I have to hit all of these,” is mentally exhausting. Instead of viewing the entire hopper as one giant task, break it down into smaller, purpose-driven blocks.

  • The 25-Ball Rule: Treat every 25 balls as a distinct set.

  • Give Each Set a Job: For the first 25 balls, focus exclusively on hitting deep crosscourt forehands. For the next 25, switch to down-the-line backhands. For the third set, practice alternating short and deep balls (like the approach shot drill).

  • Rest and Reset: Take a 30-second breather between these micro-sets. Step away from the baseline, take a deep breath, and actively tell yourself what the next objective is.

2. Set Up Physical Targets

If you aim at nothing, you will hit it every time. Hitting the ball randomly over the net reinforces bad habits and drains your focus.

Place physical targets on the other side of the court. You can use traffic cones, empty ball cans, or even a towel laid flat just inside the baseline. Giving your eyes a specific, colorful target to zero in on forces your brain to stay engaged. Count how many times you can hit the target (or land within a 3-foot radius of it) out of 10 balls. Trying to beat your own high score is a guaranteed way to keep your intensity high.

3. Focus on a Single Technical Cue

When you are still refining your foundational strokes, trying to fix your footwork, your backswing, and your follow-through all at once will cause cognitive overload.

Pick one specific technical element to focus on for a portion of the drill. For example:

  • “For the next 50 balls, I am only focusing on watching the ball physically hit my strings.”

  • “During this round, my only goal is to ensure a perfect, early split-step before the machine fires.”

  • “I am going to focus entirely on finishing my swing over my shoulder.”

When your mind starts to wander, gently pull it back to that single, simple cue.

4. Shadow a Real Opponent

One of the biggest traps of ball machine training is that you never have to read an opponent’s body language. To prevent your feet from getting lazy, visualize a player on the other side of the net.

  • Move to the center: After hitting a ball out wide, physically recover back to the center mark using side-shuffles, just like you would in a match.

  • Breathe and grunt: Exhale sharply or grunt on contact to force yourself to breathe rhythmically and maintain explosive energy.

5. Utilize the Machine’s Unpredictability

If you know exactly where the ball is going every single time, your brain goes on autopilot. To stay sharp, use the random oscillation features on your ADIBO machine.

Feature to UseWhy It Works
Horizontal SweepForces you to constantly react left or right, preventing you from planting your feet and getting lazy.
Random DepthMakes you read the trajectory of the ball instantly, training you to move forward to attack or backward to defend.
Varied SpinAlternating between heavy topspin and slice feeds forces you to constantly adjust your strike zone and racket face.

Training solo with a machine is a privilege, but it requires discipline. By gamifying your sessions, using targets, and breaking long runs into bite-sized sets, you will ensure that every single ball you hit translates to real, tangible improvement in your next match.


Mastering Your Transition Game: From the Baseline to the Net

If you want to elevate your tennis game to the next level, you cannot stay glued to the baseline forever. Sooner or later, you have to move forward, take the ball early, and finish the point at the net. This crucial phase of play is known as the transition game, and mastering it requires precision, confidence, and the right approach shot drills.

Transitioning from the baseline to the net can feel intimidating, but with targeted practice, it will become second nature. Below is a breakdown of how to train your transition game effectively using a ball machine.

The Ultimate Ball Machine Drill

One of the most effective ways to build confidence moving forward is to simulate real-match scenarios where you are forced to change your court position rapidly.

The Setup: Program your machine for a short ball followed by a deep one to practice your approach shots.

This specific sequence is brilliant because it forces you to practice the two most critical movements in tennis: attacking the short ball and recovering for the next shot.

How to Execute the Drill

Here is how you can break down this specific approach shot drill step-by-step:

  • Step 1: Attack the Short Ball

    When the machine feeds the short ball, immediately recognize the depth and move forward aggressively. Keep your center of gravity low and hit your approach shot (either a biting backhand slice or a heavy topspin forehand) deep into the corners.

  • Step 2: Close the Net

    Do not stop moving after you hit the short ball. Follow the path of your shot and establish your position at the net, ideally around the service line, ready for a volley.

  • Step 3: React to the Deep Ball

    The machine will immediately feed a deep ball. This simulates a high-quality lob or a deep passing shot from your opponent. You must quickly recognize the trajectory, pivot, and backpedal to hit an overhead smash or a high-bouncing defensive groundstroke.

  • Step 4: Reset and Repeat

    Once you have handled the deep ball, quickly find your footing back at the baseline, ready for the next short ball feed.

Keys to a Successful Transition Game

To get the most out of this drill, keep the following technical elements in mind:

Focus AreaDescription
Early RecognitionThe transition game starts with your eyes. The split-second you realize a ball will land short, your forward movement must begin.
Continuous MomentumHit your approach shot through the ball. Your body weight should be moving forward toward the net as you make contact.
Split StepAs you close in on the net, remember to split step right as your imaginary opponent would be making contact with their passing shot.

The transition game is all about controlled aggression. By programming your ball machine to alternate between short and deep feeds, you train your legs and your brain to handle the dynamic, multi-directional movement required to dominate the court. Get out there, set up your machine, and start attacking the net!

Mastering the Cross-Court Smash: Why Angle is Everything

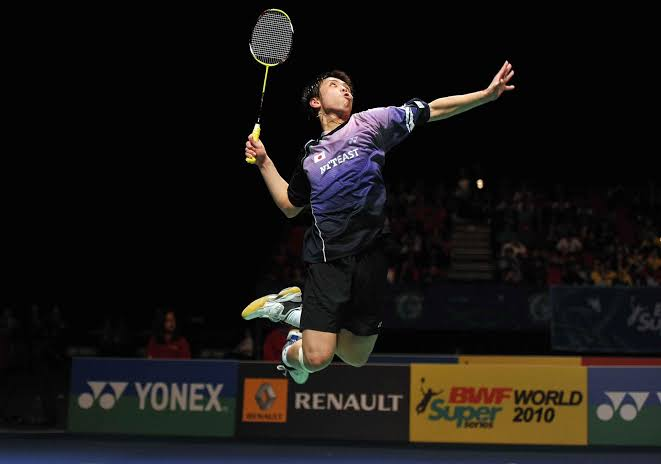
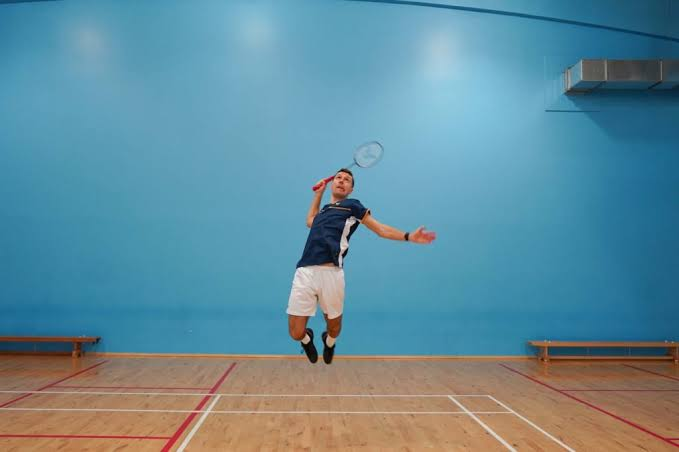
In badminton, the straight jump smash is the crowd-pleaser—it is loud, fast, and aggressive. But as you climb the ranks, opponents become highly adept at blocking straight attacks. To truly break down an elite defense, you must integrate the cross-court smash into your offensive strategy.

However, this shot is a double-edged sword. It travels a longer distance than a straight down-the-line smash, giving your opponent a fraction of a second more to react. If you don’t execute it with the correct angle, or if you fail to recover instantly, you leave the entire opposite side of your court wide open for a devastating counter-attack.


The Geometry of the Cross-Court Attack

When you hit cross-court, the shuttle must pass over the highest part of the net (the edges are naturally slightly higher than the center tape) and travel on a diagonal plane.

Because of this added distance, raw power will not guarantee a point. The secret is the angle of descent. A perfectly executed cross-court smash should land within the tramlines (the side alleys) and ideally in front of the mid-court line. If your smash lands too deep in the rear court, it loses its sting and simply becomes a fast clear, easily returned by your opponent.

Execution: Slicing for Steepness

To achieve that steep, unreachable angle, you cannot hit the shuttle perfectly flat. You need to employ a slight “slice.”

  • Body Positioning: Prepare just as you would for a standard straight smash to disguise your intention. Keep your shoulders turned side-on to the net.

  • The Point of Contact: Strike the shuttle slightly further out to your side than you would for a straight smash.

  • The Wrist Snap and Slice: As your racket makes contact, brush the strings slightly across the cork of the shuttle (cutting the shuttle). This slicing motion sacrifices a small amount of outright speed but imparts a heavy downward trajectory, causing the shuttle to dive sharply over the net and pull your opponent out of their defensive base.

Surviving the Counter-Attack: The Vulnerability Zone

The biggest risk of the cross-court smash is what happens immediately after you hit it.

当你横向挥拍时,惯性自然会将你拉向边线。如果对手成功地将你的扣杀沿直线拦下(经典的“直线拦网”防守),你就会突然被困在球场的错误一侧,面对着一大片空地。

为避免此漏洞:

  1. 不要过度负重: 你必须在空中保持足够的核心控制力,才能以平衡、宽阔的站姿落地。

  2. 反冲: 双脚触地瞬间,用外侧脚爆发性地将自己推回中线。

  3. 预判直线障碍: 顶尖球员打斜线球时,预期对手会回直线球。你的球拍应该在对手击球前就抬起来拦截拦网。

初学者手眼协调训练:告别接球失误

刚开始学羽毛球时,最令人沮丧的莫过于明明脑子里有个“击球”的指令,球拍却总是打不到球。总是打空羽毛球或者球拍框总是碰到球,这是所有初学者都会遇到的问题。好消息是:这完全正常,更重要的是,这个问题很容易解决。

问题很少出在你的挥杆动作上,而是你的视觉追踪。羽毛球在空中飞行时会迅速减速,这会完全打乱任何习惯于追踪网球或棒球的人的节奏。如果你正在探索…… 羽毛球入门掌握手眼协调能力是第一步。

以下是三个简单而高效的方法 协调训练 你可以通过一些方法来训练你的眼睛和手协调工作。

练习 1:穿梭杂耍 (Keepie-Uppies)

在你尝试将羽毛球击过球网之前,你需要了解球从球拍床上弹起的感觉。

  • 操作方法: 以放松的正手握法握住球拍,球拍平放在身前。将羽毛球抛向空中,并尝试用球拍面连续击球,使其不落地。

  • 焦点: 击球时,眼睛要始终盯着羽毛球的底部(软木部分),而不是羽毛。尽量每次都击中球的甜区(中心)。

  • 进展: 当你能连续用正手击球50次后,就换到反手。想要更有挑战性,就每次弹跳都交替使用正手和反手。

练习2:靠墙集结

这是在无需搭档的情况下提高反应时间和追踪速度的最佳方法。

  • 操作方法: 站在距离平坦坚固的墙壁约 6 到 8 英尺的地方。将羽毛球击向墙壁,并尽量保持连续击球。

  • 焦点: 墙壁回击羽毛球的速度是人类对手从底线回击速度的两倍。这迫使你缩短挥拍幅度,更多地依靠手腕发力,并高速追踪羽毛球的飞行轨迹。

  • 进展: 一开始,尽量把球打到墙上高处,给自己争取更多时间。随着协调性的提高,逐渐降低击球点,模拟快速平击球的效果。

练习3:接球和放球

有时候球拍会妨碍视觉追踪。暂时拿掉球拍可以帮助你的大脑完全专注于羽毛球的飞行轨迹。

  • 操作方法: 让搭档站在球网对面,向你打高远球。不要回击,把球拍放在地上。追踪球的飞行轨迹,尝试用你的裸手在球拍的甜区(高球时在头顶上方,挑球时在身前)接住球。

  • 焦点: 这迫使你移动双脚,完美地落到羽毛球下方,彻底消除了伸手挥杆的习惯。

精通绕头投篮:后场防守的终极武器

反手后角是球场上最难防守的区域,这一点众所周知。当被逼到这个区域深处时,大多数球员会本能地选择软弱无力的防守型反手高远球,这几乎等于是在邀请对手来一记势大力沉的扣杀。然而, 高级羽毛球放弃进攻是绝对不可能的。

进入 绕头射击对于初学者来说,用正手挥拍击打反手位的羽毛球,同时扭曲上半身,看起来可能有点别扭,但这对于在球场最深处保持进攻压力来说,绝对是一项至关重要的技术。


为什么选择绕头击球而不是反手击球?
  • 卓越的动力和速度: 正手击球的力量天生就比反手击球大得多。通过身体前倾,将球绕过头部,你可以打出穿透力极强的进攻性高远球、快速的平抽球,或者出其不意的斜线吊球。

  • 完全欺骗: 因为你采用了标准的高位正手准备动作,所以你的对手无法立即判断你要打什么球。

  • 快速法院赔偿: 传统的反手击球迫使你完全背对球网。而绕头击球则可以让你保持髋部部分打开,从而更快地回到中心位置。

完善执行

要想掌握这种看起来别扭但威力十足的射击技巧,你需要专注于动作的三个关键阶段:

  1. 剪刀腿步法: 你必须拥有好身材 在后面 发球。以非惯用脚在前,斜向后撤步至反手位深区。准备击球时,在空中快速做“剪刀腿”动作,动态交换双脚以产生旋转力量。

  2. 拱门与远征: 拱起背部,并将躯干大幅度向非惯用侧倾斜。持拍手臂必须伸出并越过头顶,击球点略微位于非惯用肩的后方和上方。

  3. 后续行动: 由于身体侧倾,你的随挥动作自然会横跨身体而非垂直向下。利用大力挥杆的惯性带动你的惯用脚向前,这会立即将你的回位动作带回球场中央。

心理韧性:在赛点压力下保持冷静

决胜局比分20平。你感觉肺部灼烧,人群模糊不清,羽毛球仿佛比一小时前重了十倍。在这关键时刻,体力和技术都显得不那么重要了。赢得接下来两分的球员未必是最快或最强壮的——而是拥有更强意识的球员。 运动心理学.

掌握 羽毛球心理战 对于任何竞技选手来说,心理素质都是最终的挑战。如果你发现自己总是输掉势均力敌的比赛,或者在压力之下犯下反常的错误,那么是时候像训练步法一样训练你的心理素质了。


“窒息”的剖析

“窒息”并非软弱的表现;它是对感知到的威胁的一种生理反应。当你只关注结果时——如果我输掉这一分会怎么样?——你的大脑会触发战斗或逃跑反应。

心率骤升,血液从四肢流走。这会导致典型的窒息症状:

  • “死亡之握”: 你握拍太紧,破坏了放松手指的力量,而这种力量对于制造假动作和打出刁钻的角度至关重要。

  • 仓促的脚步: 恐慌会导致你在追踪航天飞机之前就移动,从而破坏你的分步计时。

  • 呼吸浅促: 缺氧会导致决策能力下降和立即感到疲劳。

掌握羽毛球心理战的策略

克服这些生理反应需要有意识地进行心理训练。以下是如何掌控你的神经系统,在关键时刻保持冷静的方法:

1. 关注过程,而非结果

赛点上最大的陷阱是想象胜利(或失败)。你无法控制最终比分,你只能控制下一步的行动。把你的世界缩小到眼前的任务。告诉自己: “注意观察他们手中的球,” 或者 “握得别太紧。” 通过专注于技巧,你可以给大脑安排一项有益的任务,从而驱散焦虑的想法。

2. 实现复位程序

观察任何一位顶尖职业球员在关键发球或接发球前的动作——他们每次都会做完全相同的事情。他们可能会弹球三次,调整球拍线,或者深深地、清晰地呼出一口气。这个微小的习惯动作就像一个锚点,它向你的身体发出信号:这只是又一个普通的得分,和你在练习中打过的成千上万个得分一样。

3. 战术呼吸法

压力增大时,呼吸会变得急促而浅。在比赛间隙,可以尝试用简单的4-4-4节奏来刻意降低心率:吸气4秒,屏住呼吸4秒,呼气4秒。这种方法能有效地让神经系统平静下来,恢复手指和手腕的精细动作能力。

战术部署:精准打击“四角”以主宰球场

走进任何一家羽毛球馆,你都会听到球员们奋力扣杀、力求取胜的雷鸣声。人们很容易陷入一种误区,认为蛮力才是制胜法宝。然而,顶尖球员深谙一个基本道理:让对手疲于奔命远比强行突破更有效。

你武器库中最具杀伤力的武器不是你的重击——而是你的 穿梭机放置通过掌握“四角战术”,你可以在系统性地消耗对手体力的同时,保存自己的能量。

为什么精准胜过蛮力

单纯依靠力量进攻是一种高风险、高消耗的打法。频繁的跳跃扣杀会迅速消耗你的体力,并常常导致非受迫性失误。此外,面对防守出色的对手,可预测的扣杀很容易被回击。

优越的 羽毛球战术 关键在于控制场地。当你优先考虑落点而非力量时,你就能掌控比赛的节奏。你会迫使对手进入尴尬的扑救姿势,延缓他们的回防,并在他们半场创造出大片空当,让你轻松完成终结进攻。

了解“四角”策略

“四角战术”顾名思义,就是将球持续打向对手球场的四个极端角落(深远正手、深远反手、网前正手和网前反手)。

目标是迫使对手移动尽可能长的距离。左右移动棋子很有效,但沿直线移动棋子效果更佳。 对角线例如,从后手位到前手位,迫使他们覆盖最大范围的距离,破坏他们的平衡和脚步节奏。

如何执行该策略

要将这种理念运用到你的比赛中,你需要有意识地混合使用不同的投篮方式:

  • 攻击后方纵深: 利用高远球和快速平推球将对手压制在底线。攻击深远的反手位尤其有效,正如我们在后场防守指南中讨论的那样。

  • 利用前端网络: 一旦将他们压制在后场,就使用精准的吊球和旋转网前球,引诱他们拼命向前冲刺。

  • 出其不意: 四角战术的有效性在于迷惑对手。如果你击打右后角,对手自然会预判你会击打左前角。偶尔连续两次击打同一个角,就能让他们在重心转移时措手不及。

预防常见的羽毛球运动损伤:保护你的脚踝和膝盖

羽毛球是一项节奏极快的运动,其特点是爆发式的跳跃、急停和深蹲等动作。这种高强度的运动虽然令人兴奋,但也给下肢带来了巨大的压力。如果你想在球场上待得更久,避免受伤,那么重视关节健康至关重要。

对于任何球员来说,最容易受伤的两个部位是脚踝和膝盖。幸运的是,只要采取正确的方法…… 运动安全这样可以显著降低常见扭伤和拉伤的风险。

为什么是脚踝和膝盖?

羽毛球运动中的大多数动作都需要突然改变方向和承受较大的冲击力。

  • 脚踝 在横向移动或跳跃猛击后失去平衡落地时,极易发生翻滚或扭伤。

  • 膝盖 在深蹲前冲(尤其是在网前)时承受大部分力量,以及爆发性脚步动作的反复冲击,常常导致髌腱炎(跳跃膝)或韧带拉伤。

有效的 羽毛球运动损伤预防 需要积极主动地结合有针对性的热身运动、肌肉力量训练和合适的器材。

赛前必备热身运动

千万不要在热身状态就上场。适当的动态热身可以促进血液循环,润滑关节,并使肌肉为比赛中的爆发性动作做好准备。

  1. 关节旋转: 首先进行缓慢、可控的踝关节和膝关节画圈运动,以提高活动范围。

  2. 动态弓步: Perform light, shallow walking lunges to wake up the quadriceps and glutes. Gradually deepen the lunge as your muscles warm up.

  3. Leg Swings: Forward-and-back and side-to-side leg swings help open up the hips and loosen the hamstrings, reducing the pull on your knee joints.

  4. Shadow Footwork: Spend 3-5 minutes doing light, slow-motion shadow footwork (like the chassé step) to prime your nervous system for badminton-specific movements.

Strengthening for Injury Prevention

Strong muscles act like shock absorbers for your joints. Incorporating a few simple exercises into your weekly routine will build the structural integrity needed to withstand intense rallies.

  • For the Ankles: Calf raises (both straight-legged and bent-knee) strengthen the muscles supporting the Achilles tendon and ankle joint. Resistance band work, focusing on pushing the foot outward and inward, builds vital lateral stability.

  • For the Knees: Squats and Bulgarian split squats are excellent for strengthening the quadriceps, which stabilize the kneecap. Hamstring curls and glute bridges ensure the back of your leg is strong enough to decelerate your body during a deep lunge.

Escaping the Danger Zone: How to Recover After a Deep Backhand Corner

Getting trapped in the deep backhand corner is widely considered the most difficult move in badminton. You are stretched to your absolute limit, and your momentum is carrying you away from the play. Often, you manage to hit a desperate clear or drop, but before you can reset, your opponent has already exploited the massive open space you left behind.

The secret to surviving this scenario isn’t just about the shot you play—it’s about your court recovery. At ADIBO, we know that mastering your movement is the ultimate key to dominating the court. To get back to the center fast and stay in the rally, you need to learn and perfect the ‘chassé’ step.

Why the Deep Backhand is a Nightmare

When you lunge deep into the rear backhand corner, your center of gravity shifts drastically. If you simply turn your back to the net and run back to the middle, you lose visual contact with the shuttle, throw off your balance, and delay your reaction time.

有效的 badminton footwork recovery is what separates amateur players from elite competitors. You must be able to return to your base position quickly while keeping your eyes locked on your opponent’s racket.

The Solution: Mastering the Chassé Step

The chassé step—often referred to as a shuffle or gallop—is a rapid, gliding movement where one foot chases the other without ever crossing over. This technique is the golden rule for lateral and diagonal court recovery. It allows you to cover maximum ground while keeping your shoulders square to the net, ensuring you are instantly ready to react to the next shot.

Here is how to execute it flawlessly:

  • The Explosive Push-Off: The moment your racket makes contact with the shuttle in the deep corner, use your dominant foot (the lunge foot) to explosively push your body weight back toward the center of the court.

  • The Chassé Movement: Initiate the chassé step immediately. If you are right-handed, your left foot will slide quickly toward your right foot in mid-air, effectively “pushing” the right foot further out toward the center base.

  • Maintain a Low Profile: Keep your knees slightly bent during the entire sequence. Popping up too high wastes precious milliseconds and ruins your balance.

  • Land with a Wide Base: Finish the movement by landing in a split step with a wide stance. A low, wide center of gravity provides the spring-like tension needed to launch into your next movement.

× WhatsApp